|
|
Field
|
Value
|
|
|
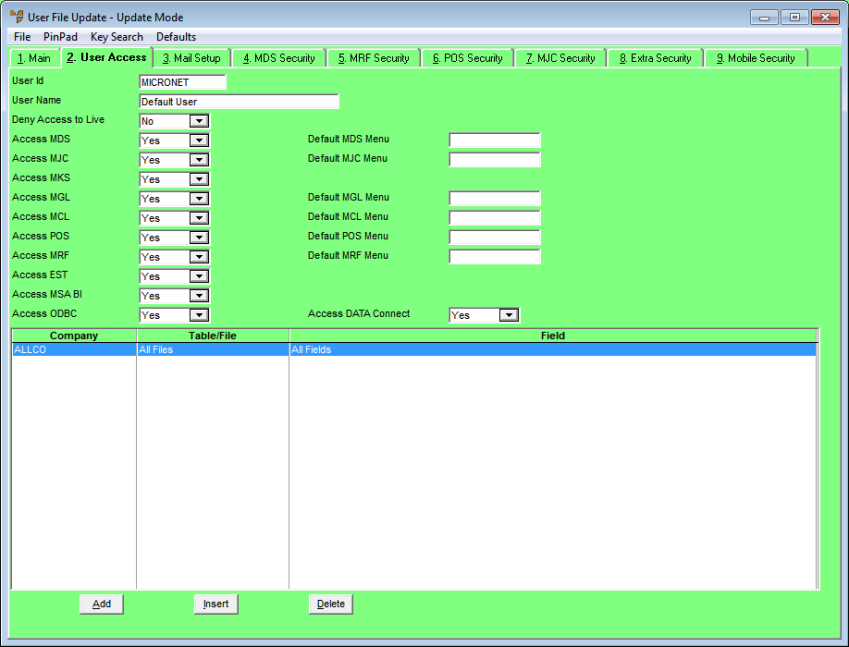
Deny Access to Live
|
Select Yes if you want to prevent this user from accessing the live Micronet systems. They may, however, access the DEMO and EOM (End of Month) areas. Select No if you want the user to be able to access the live Micronet systems.
|
|
|
Access MDS
|
Select Yes if this user can access the Micronet Distribution System, or No if they cannot.
|
|
|
Default MDS Menu
|
If you have customised MDS menus for specific individuals or groups of users, enter the name of the customised menu the user should access. Leave this field blank for the standard Micronet menu.
|
|
|
Access MJC
|
Select Yes if this user can access the Micronet Distribution System, or No if they cannot.
|
|
|
Default MJC Menu
|
If you have customised MJC menus for specific individuals or groups of users, enter the name of the customised menu the user should access. Leave this field blank for the standard Micronet menu.
|
|
|
Access MKS
|
Select Yes if this user can access the Micronet Kitting System, or No if they cannot
|
|
|
Access MGL
|
Select Yes if this user can access the Micronet General Ledger system, or No if they cannot.
|
|
|
Default MGL Menu
|
If you have customised MGL menus for specific individuals or groups of users, enter the name of the customised menu the user should access. Leave this field blank for the standard Micronet menu.
|
|
|
Access MCL
|
Select Yes if this user can access the Micronet Creditors Ledger system, or No if they cannot.
|
|
|
Default MCL Menu
|
If you have customised MCL menus for specific individuals or groups of users, enter the name of the customised menu the user should access. Leave this field blank for the standard Micronet menu.
|
|
|
Access POS
|
Select Yes if this user can access the Micronet Point of Sale system, or No if they cannot.
|
|
|
Default POS Menu
|
If you have customised POS menus for specific individuals or groups of users, enter the name of the customised menu the user should access. Leave this field blank for the standard Micronet menu.
|
|
|
Access MRF
|
Select Yes if this user can access the Micronet Roll Forming system, or No if they cannot.
|
|
|
Default MRF Menu
|
If you have customised MRF menus for specific individuals or groups of users, enter the name of the customised menu the user should access. Leave this field blank for the standard Micronet menu.
|
|
|
Access EST
|
This option is no longer used.
|
|
|
Access MSA BI
|
If you have customised Micronet Business Intelligence menus for specific individuals or groups or users, enter the name of the customised menu the user should access. Leave this field blank for the standard Micronet menu.
|
|
|
Access ODBC
|
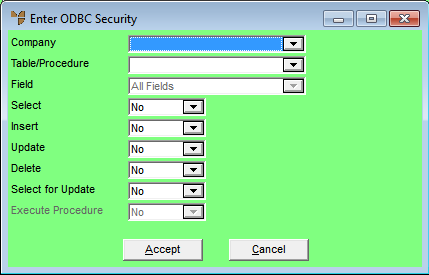
If your company is registered for the Micronet ODBC module, select Yes to allow this user to access the ODBC database, or No if they cannot. You set the user's access preferences for ODBC using the bottom part of the screen as detailed below.
|